Home, Family, Cooking, and Education

Showing posts with label by Gloria H.. Show all posts

Monday, August 26, 2013

Aloha Burgers


These juicy sweet and savory burgers are the perfect ensemble to your back yard barbecue with a touch of Hawaiian spirit. These are not a traditional Hawaiian burger per say, they are actually a creation of my husband's from a vacation we took to Maui (2005). He grabbed a fresh pineapple from a local fruit stand and headed for the grill. We put everything on the grill; onions, pineapple, pepper marinated ground beef, a sweet bun, and even heated some leftover bacon. We complimented it with sharp Cheddar cheese, lettuce, tomato, and some Mayo just for good measure.
Since then we enjoy a bit of aloha in every bite!


Meats:


Ground Beef- Marinate with our Sweet Pepper Marinade recipe or Luau Marinade or we have used bottled or packaged black pepper marinade.They are fast and easy to use. You can marinate the beef and then make the patties, marinate patties, or spread marinade over the patties as you cook them.

Bacon- Cook bacon anyway you choose until crispy. We usually do about 1.5 slices per burger.
We also love to use turkey bacon!

We also enjoy these ground beef substitutes from time to time:

  • Ground turkey or chicken
  • Grilled Chicken
  • Bison
  • Veal  

Sweet Black Pepper Marinade Recipe:
1-2 Tablespoons fresh coarse ground black pepper
1 teaspoon kosher salt
1 Tablespoon dark brown sugar
2 garlic cloves equivalent of California Style Garlic Powder
1 tablespoon dried onion
1/4 cup Pineapple Puree or Pineapple Juice (optional) 
1/4 cup balsamic vinegar
1/4 cup of Worcestershire Sauce
1/2 cup vegetable oil
2 tablespoons Apple Cider Vinegar or White


Directions:
Mix all dry ingredients, add to liquid ingredients and stir. Pour into a bag or glass dish for marinating. Marinate meat for at least 15 minutes. Makes 4-6 burgers or up to 4 chicken breasts.

Luau Marinade Recipe: 

1/4 cup Brown Sugar
1 teaspoon Salt
1 teaspoon Red Pepper (optional)
2 cloves equivalent of dry Garlic
1 Tablespoon Onion Powder
1 teaspoon Paprika
1 teaspoon Ginger
2 Tablespoons Tomato Paste
1/3 cup Soy Sauce
Sweetener: 1/4 cup Pineapple juice,1/2 cup Pineapple Puree, 1/3 cup of honey, or 2 T molasses
I just use what I have or mix some of each sometimes

Blend together and then add 1/4 cup of oil and 1/3 cup of apple cider vinegar
Add meat and marinade for at least 15 minutes. I like to marinade over night or all day up to dinner. 

This makes enough for 4 patties to marinade 
(I usually double or triple if I have guests)


Pineapple


Cut your pineapple in thick or thin slices. You don't even need to cut a hole in the middle because it will soften as it grills.  


Grill pineapple along side your meat.


Bun: Grilled or Plain
We like to used a regular wheat bun, but we have used King's Hawaiian Sweet hamburger buns and they seem to give it another touch of sweetness that compliments the salty bacon, cheese, and burger. We also love to make this burger wrapped up in lettuce, it is a great way to enjoy if you are avoiding gluten/carbs. 

Barbecue Sauce:
We recommend a sweet/savory/smoky barbecue sauce to go on this burger. We especially like Pendleton barbecue sauce, Stubs All Natural Honey Pecan, or my mother's barbecue sauce recipe she likes to whip up for things such as these.

Gloria's Barbecue Sauce Recipe:
1 cup of Ketchup
1/2 cup brown sugar
1-2 Tablespoons Liquid Smoke
2 Tablespoons Mustard
2 Tablespoons Apple Cider Vinegar
2-4 Tablespoons of Worcestershire Sauce

Mix together and add to your favorite dish. Works especially well with baked barbecue dishes.

Assembly:
Staring from the bottom bun- Marinaded burger, sharp or smoked Cheddar cheese, grilled pineapple, barbecue sauce, Bacon, lightly grilled or raw Red onions, shredded lettuce, sliced tomato, and Mayo.


Print Friendly and PDF

Saturday, February 9, 2013

Gluten Free Lunch Lady Brownies


photo taken by Madeline L.


I love this recipe so much! My sister in law -who worked with the lunch lady in this story- gave me this recipe to me more than 30 years ago and since then, I have made it for my children over and over again. Unfortunately, two of my children were diagnosed with Celiacs disease years ago which left me with no choice but to make many of my favorite recipes gluten free.

So, I took this recipe right from this blog (pictures and all) to provide a gluten free version for all of those that have an intolerance to gluten or choose to eat a gluten free diet by choice.

The Lunch Lady Story:
As my daughter Madeline tells it, this brownie recipe is no ordinary recipe, because it has been in our family for years. Yes, many brownie recipes today share similarities, but this recipe is special because it means so much to us. The recipe was made in a local Jr. high school cafeteria years before I even taught school there. No one knows where the recipe originated from, but it had been in the making for over 50 years. In a small town in Idaho, you can imagine how these lunch lady brownies became so popular that they were entered in local bake sales and fund raisers.

As it goes, this recipe is a piece of history. It has brought people together and is meant to be shared. Most people say it comes out like cake, while many say fudge. Either way, it is warm  chewy creation that keeps my family coming back for more.

If you would like the original recipe for Lunch Lady Brownies Click Here.


Recipe for Gluten Free
Bonneville Jr. High school Brownies:

Ingredients:
1 cup of Butter (I use unsalted)
1/2 cup of Cocoa
1 1/2 cups of Brown Rice Flour
1/4 cup of Tapioca Flour (or Tapioca Starch)
1/4 cup of Potato Starch (not Potato Flour)
1 Tablespoon of Xanthan Gum
2 cups of Sugar
4 Eggs
4 teaspoons of Vanilla
1 cup of Chopped Nuts (optional)

Directions:
I melt my butter in the microwave and pour into my mixer, then I add cocoa and mix together until smooth.


Then I add all the flours, starches, and Xanthan Gum, and sugar. Beat together and then add eggs, vanilla, and nuts. Mix until combined. Do not over stir.


Pour into greased, floured  9x13 baking pan*. 
* An additional part of this recipe said that if you want to double the recipe, use a large baking sheet.

Additional Note * This batter will be runny like a cake mix. But, you may have to spread it out over your pan with a rubber spatula still. 


Since I have an older oven, I find I have to bake mine for up to 30 minutes. Don't over bake these those, check them at 20 minutes.
Bake in a pre-heated oven @ 350 degrees.  

Wait only about 10 minutes to frost brownies.
Frost them while they are warm (not hot). Wait for them to cool some more and they enjoy them with milk or ice cream.


The Chocolate Icing Recipe:
To make while the brownies bake
1/4 cup of softened Butter
1/4 cup of canned Milk (regular milk is fine)
1/4 cup of Cocoa
3 cups of Powdered Sugar
Dash of Salt
Mix all together and frost as desired.

Suggestions:

You can also make these into Marshmallow brownies by putting marshmallow all over the top when there is 5 minutes left to bake them, and then wait for them to cool, and frost over the marshmallows.

I also like to add mint to the batter and/or to the frosting for a mint flavor.
Print Friendly and PDF

Wednesday, May 2, 2012

May's Author of the Month- Gloria H.


Gloria H.
Idaho
Saltbox House author since 2009

Click Here to Read Her Bio


Favorite Foods:
I don't have a favorite food, but I do like chicken in all different varieties. It can taste delicious when nothing else does. I also like a good tasting shrimp. It has to be a good variety though. I love a good baked potato with sour cream and good string beans. I guess anything can be good (since I seem to say that), but these items top my list.

Favorite Restaurant(s):
I like several, but no one is my favorite. I like Cheesecake factory because it's menu has such a variety. Very few restaurants awe me. 

Inspiration to Cook:
Trying something new that looks and taste delicious. Usually the pictures says it all but I found that does not mean it tastes as good as it looks. I like experimenting, and I think cooking brings out the creativity in yourself.

Feelings about Food:
I always like to try new things!

At the Table:
I like cooking for others if I have the stamina to do so. I do not like to entertain as much though, my family is my main concern and I enjoy cooking for them so they have a balanced meal and a variety.

Here at Saltbox House, we have been inspired by Gloria's recipes and enthusiasm for trying new things and chose her for this month's author of the month not only because she is a wonderful addition to this blog, she has inspired the creator of this blog, Madeline L., since Madeline was a child. May celebrates motherhood and Saltbox House would like to acknowledge, a very special mother and the dedication she has made to her family when is comes to dinnertime. To view all of Gloria's current posts such as delicious recipes, cooking creations, and other food topics see link list below:
Carrot Cake with Caramel Sauce *Most famous post!

Print Friendly and PDF

Tuesday, April 17, 2012

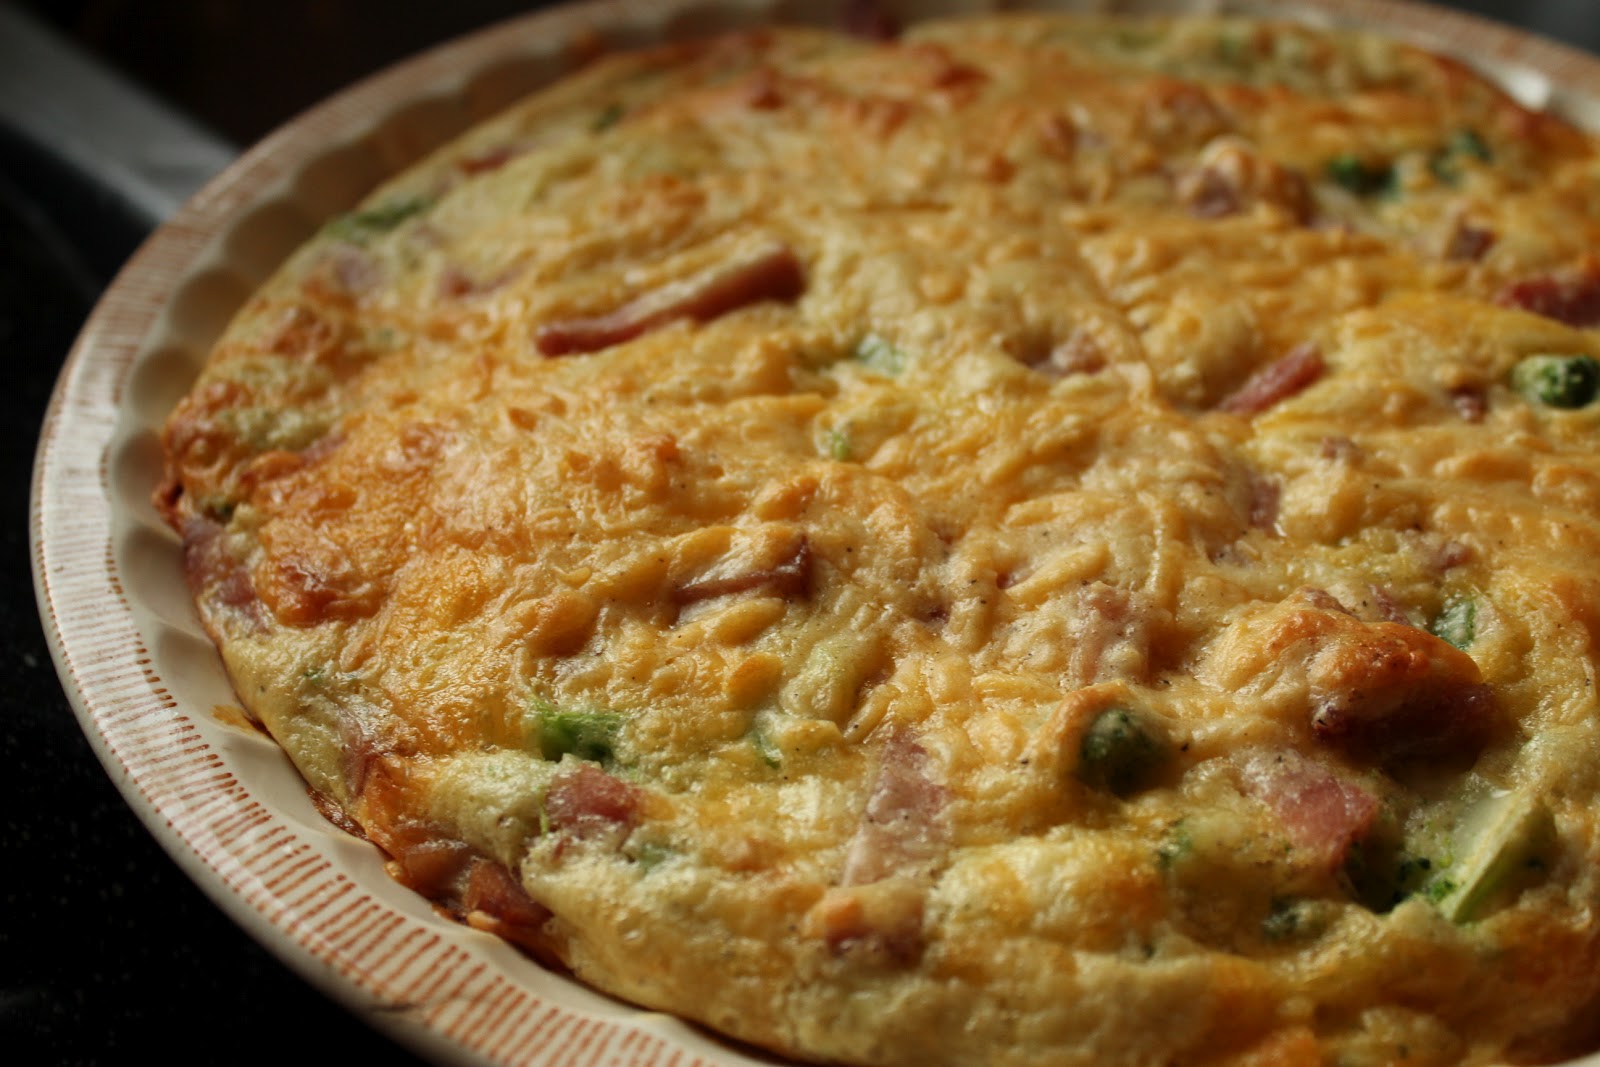
Broccoli and Ham Quiche

All photos by Madeline L.

This recipe I have had for years. It is great for those of you that want to make quiche without the fuss of making a separate crust. The *original recipe calls for Bisquick, but I prefer to make my own baking mix.

Ingredients:
1 package of pre-cooked or frozen broccoli
1 cup of cubed ham
1 cup of Cheese, shredded (any)
1/2 of green bell pepper
1/2 cup onions, chopped
1 cup of Bisquick or your own baking mix (see mine below)
3 eggs
1 1/2 cup of milk
1 tsp of salt
1/2 tsp of pepper


Directions: 
Step 1-
In a greased pie pan, put in the broccoli, onions, green peppers, ham, and cheese.  


 Since I usually make a couple of quiches when we have brunch with the family I make this much baking mix, but you can always cut this in half to make a little over 1 cup.

Baking Mix
(Substitute for Bisquick)
2 cups flour (any kind really) I like to use flour I grind from hard red or white wheat.
1/8 cup baking powder
1-2 teaspoon of salt
1/2 of a cube (1/4 cup) of Butter, cold not frozen

Put all ingredients into your food processor and blend until combined well.


Directions for Egg Mixture:
Mix milk, baking mix, salt and pepper together with whisk.  


Pour over other ingredients.


Bake in a pre-heated oven 400 degree oven for 35-40 minutes.

This recipe is easy to change up with different meats and veggies. It is also delicious served with fresh tomatoes or tomato salsa.

*Original recipe taken from the Yellowstone Cookbook.
Print Friendly and PDF

Friday, August 26, 2011

My Favorite Snack with ak-mak Crackers

Photo by Madeline L.
This snack has been a favorite of mine since I discovered these crackers. They are not rich or flavorful cracker by any means, but they do posses a wholesom and hearty feeling. In addition to being 100% organic, they claim to use the "whole" grain of wheat which beings you a high-protein wheat,all of which rests on their reputation for sustainability and overall nutritional value. This original Armenian cracker bread has a history dating back thousands of years and was brought to the United States in 1893. Honeslty, it just satifies me and provides a nutrious snack as well.

ak-mak Snack-

Ingredients:
4 ak-mak crackers
2 wedges of Garlic and Herb Laughing Cow Cheese (light)
1/2 of Sweet Bell Pepper and or Tomatoes

Directions:
Spread about a half of wedge on each cracker and top with slices of pepper and/or tomatoes. Enjoy!


To learn more about ak-mak products, visit their website
Print Friendly and PDF

Saturday, July 23, 2011

Healthy Chewy Rich Brownies


Photo by Madeline L.

I've been on a health kick for months now and these are my little reward that I like to bite into now and then. I fact, I keep them in the freezer after making them and take out one piece when I just want some chocolate without the guilt. These are so healthy, that I don't even think about them as a dessert, but more of a snack because they have a lot of ingredients that a power bar would have (good for breakfast too). I recommend trying them out and see what you think for yourself. Gluten-free are great too (see below).

Rich and Chewy Brownies
from Food Lovers

Dry Ingredients:
1 cup Evaporated Cane Juice
1 cup 100% Whole Wheat Flour (you can use rice flour for a gluten-free version)
1/2 cup Natural Unsweetened Cocoa Powder
1 Heaping Scoop of Vanilla Protein Powder
1 teaspoon of Baking Soda
2 Tablespoons 60% Cocoa Semi-Sweet Chocolate Chips
1/2 Walnut Pieces

Wet Ingredients:
2 Eggs Whites
1 cup Unsweetened Applesauce
2 Tablespoons Original Soy Milk (Silk brand is great)
1 Teaspoon of Vanilla Extract

Directions:
Preheat oven to 350 degrees. Set aside 1 Tablespoon of walnuts and chocolate chips for the topping. Mix remaining dry ingredients together. Try to mix until lumps are gone. In a separate bowl mix the wet ingredients. Slowly add dry ingredients and mix well to prevent lumps. Pour mixture into a sprayed 8x8 baking pan. Top with walnuts and chocolate chips. Bake for 30-40 minutes.
Print Friendly and PDF

Tuesday, February 22, 2011

Crab Burgers (Open faced)


Photo by Madeline L.

This recipe takes me back to when I went to an all girl's party up at a cabin when I was younger. I remember having such a great time, but what I really remembered was the crab burgers my friend's mother made us with a side of potato chips. In fact, I can still see her taking them out of the broiler. Since that time in the cabin, I took this recipe with me to my mother who continued to make them for me and my sisters. After a time, when I got married and had children, I wasn't sure if my memory of the recipe was quite right. Now, that I have discovered Facebook, I was able to get into contact with my long lost friend Marianne and requested the recipe for this delicious memory so to speak. So, thank you Marianne, and to everyone who enjoys a good crab burger, this ones for you!

Marianne Stone's Original Crab Burger Recipe-
Ingredients:
8oz. Dungenous Crab 
1 can Tomato Soup undiluted
1/2 finely chopped Walla Walla Sweet onion
2 heaping Teaspoons of Best Foods Mayo 
8 oz. sharp Cheddar Cheese grated


Directions:
Mix together, spread on half of a hamburger bun, broil on low in the oven until bubbly.


My version of Crab Burgers-

Makes 6 sandwiches
1 (6-ounce) can of lump crab meat, drain well
1/3 cup ketchup
1/4 cup mayonnaise
1 teaspoon Worcestershire sauce
1/2 cup cheddar cheese, shredded
1/2 cup onion (green or sweet)

Mix all ingredients together. Spoon onto an open hamburger bun. Sprinkle some cheese on top. Turn on oven to Broil. Place open face buns onto baking sheet. Broil with oven door partly open and cook until cheese is melted and buns have browned around the edges.
Serve open face with chips, fruit or vegetable.
Additional Notes:
The best kind of crab is fresh cooked from the legs.
You can use canned pink or white crab meat as a substitute for the lump crab meat also.
Use English muffins as a substitute for hamburger buns.
Print Friendly and PDF

Tuesday, December 15, 2009

Another Addition to this Blog


Hello, my name is Gloria. I am Madeline's mother. I've been meanig to post this for some time but, as life has it, things get busy. I do like to cook and have made homemade meals for my family since I've been married. I homeschooled my three littlest girls (Madeline included) and we would have cooking classes so I could teach them how to make bread, can foods, and show them some other great things about food. I think that they learned a lot as they enjoy cooking so much. Food plays a huge role in our family ecspecially since two of my children have been diagnosed with Cilacs Diease (my daughter at the age of 2 and son at the age of 33). It has been a challenge but, we have mangaed to make it a part of our lives. Recipes and experimenting with new recipes is a must. The fact is, we love to eat food, cook food, and even talk about it. I look forward to the holidays when the kitchen will be full of all my children and grandchildren again. It is one the greatest feelings during this time of year and a little overwhelming at that.

A little about myself, I live in Idaho with my husband and we are enjoying our life together. We like skiing, golfing, and traveling but most of all, spending time with our family. As far as food goes, I think that looks can be deceiving (food should taste as good as it looks). If it tastes good, that's what it's all about. There really isn't room for being picky when your hungry.
Print Friendly and PDF

Traditional Pumpkin Bread

Photos by Madeline L.
Here is a traditional bread that I make for our neighbors and our family during Christmas. I got it from a very old cookbook that I have had since the 70's and since then has had all kinds of acidents cross its path by means of wear and tear. But, it still has some great recipes and worth holding on to. I hope all of you enjoy this one.

Pumpkin Bread:

2 cups of pumpkin                                         2 cups of sugar
2/3 c up of butter or margarine softened        1/2 cup of water
3 eggs                                                          2 1/2 cup of all-purpose flour
2 tsp baking soda                                         1 tsp salt
1 tsp cinnamon                                             1/2 tsp cloves
2/3 c dates or rasins (optional)                      2/3 cups of chopped nuts

Heat oven to 325 degrees. Grease (not oil) bottom of two 8x4 or 9x5 loaf pans. In large bowl combine pumpkin, sugar, butter, water and eggs. Beat 1 minute at medium speed. Lightly spoon flour into measuring cup, level off. Add flour, soda, salt, cinnamon and cloves. Beat 1 minute at medium speed. Stir in dates and nuts. Pour into prepared pans. Bake for 50-60 minutes or until toothpick inserted in center comes out clean. Cool in pans for 5 minutes; remove and cool completely.
Print Friendly and PDF

Tuesday, February 3, 2009

Carrot Cake Fit for a Wedding

This carrot cake dates back to when my mother was married in November of 1972 and then was used again for my sister's wedding in 1998. Since my mother's wedding, she has continued to make these for huge events and holidays. This cake is so moist, it melts in your mouth. I find it hard to just have one piece, no wonder this recipe makes so much. Enjoy your Carrot Cake Holiday.

Carrot Cake Recipe:
2 cups of Sugar
2 1/2 cups of Flour
1 teaspoon of Salt
2 teaspoons of Baking Soda
2 teaspoons of Cinnamon
1 cup of Oil
3 Eggs
1 1/2 teaspoon of Vanilla
2 cups of ground Carrots
1 3/4 cup of Crushed Pineapple (Drained)
1 3/4 cup of Plain Applesauce
1 cup of Coconut
1/2 cup of Walnuts (chopped)
Blend all ingredients except stir in carrots, pineapple, applesauce, coconuts and nuts.
This makes a lot of cake so, you can put it all in a greased shallow cookie sheet or 2 different greased cake pans. Bake at 350 for 20-25 minutes.


While it is cooking, you can make your caramel sauce.
In a double broiler combine:
Melted 2 cubes of butter (8 oz)
1 can of Evaporated Milk
2 cups of Brown Sugar
2 cups of White Sugar

Cook until sugar is dissolved and well mixed.


Pour caramel sauce on a piece of cake just before serving. Do each individually.
Don't pour all the sauce on the cake (will go soggy).
What do you think of having carrot cake without the traditional cream cheese frosting?
Print Friendly and PDF

Wednesday, December 10, 2008

Go "Nuts" with Walnut Cookie Bars

Another Cookie Celebration. This time it is National Cookie Day (4th of Dec). I can't help but think that December is a time that people eat a lot of nuts. I know that I receive a bag or two of walnuts each year. Nuts are an awesome gift for someone who likes to cook. They can be pricey depending on the type you get. But, they last a long time (in the freezer of course). Yes, nuts can go rancid like butter, coconut, and dried fruit (I also keep in the freezer to keep fresh). Not only are they called for in many recipes, but they are very good for you. This recipe is one in particular that I like to use up my walnuts for. It has a little story to it, so I'll be brief. My mother has made these for as long as I can remember. They are popular at weddings and at funerals and she'll make them by the cookie sheet full. She also makes many more during the holidays. These bars have a wonderful chewy caramelized nut flavor that just melts in your mouth. I have not had anything else that can compare to them. But, I don't get out that much either :). So, I hope you enjoy and make this recipe apart of your kitchen.
For Crust, Mix: 1 cup of flour, 1/4 cup of light brown sugar, 1/2 cup of butter (softened). I just mixed it with my fingers until it became a cross between cookie dough and a pastry crust.

Flatten out onto a 9 x13 in pan. (My mother usually doubles the recipe and spreads it out onto a cookie or jelly roll sheet) Bake in a pre-heated oven @ 350 degrees for 5-15 mins UNTIL LIGHT BROWN. Like this.


For Walnut mixture, combined: 1 1/4 cup of light brown sugar, 1/2 cup of coconut, 2 tablespoons of flour, 1 cup of chopped walnuts, 1/2 teaspoon of baking powder, and 2 beaten eggs.


Spread mixture over crust.


Baked in pre-heated oven @ 350 degrees for 15-30 mins. UNTIL MEDIUM BROWN. Like this. It should be soft but, firm. Let it cool for about 10-15 mins.


Spread a thin layer of Vanilla frosting over it. There are probably a thousand recipes all for the same kind of icing. My basic vanilla frosting is one that I have put together and has worked for me for the past 4 years. It is perfects for anything that needs a quick frost.

My Basic Vanilla Frosting: Makes about 2 cups

1/4 cup of soft butter
1 teaspoon of Vanilla
A dash of salt (yes salt)
2 Tablespoons of canned (evaporated) milk
Blend until mixed well
Add up to 2 cups of powdered sugar (depending on the consistency you want)
Print Friendly and PDF

Online Cooking Classes

Online Cooking Classes
Click here for more information